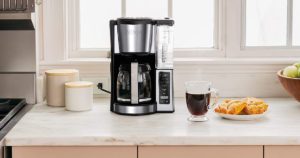
You have to start somewhere and the classic automatic drip coffee maker is a great place for beginners (or coffee drinkers of any skill level). A go-to for good reason, drip machine brewing is consistent, easy, and versatile enough to work with any coffee you like. But don’t confuse simple for basic — you can expect really good coffee, easily on par with most manual methods.
The secret’s in the right grind, proper cleaning, and filtered water. And while this recipe is specifically for a 10-cup coffee maker, you can easily adjust it for different amounts of coffee. Simply divide the water volume and coffee weight by the same number (E.g. 625 milliliters of water to 40 grams of coffee). Read on and learn how to use a coffee maker to its fullest potential.
What You Need
- Coffee Maker
- Paper Filter
- Filtered Water (44 oz / 1250 ml)
- Medium Ground Coffee (2.75 oz / 80 g (about 17 tbsp)
Instructions
1. Add Water
Fill the water reservoir with cold water.
- If you can run your tap water through a basic water filter, that’ll produce the best results.
- Bottled water works great too!
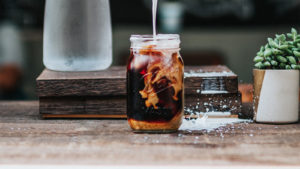
- Distilled water won’t do a great job, as your water does need some minerals to extract those tasty flavors. You can absolutely use the markings on your drip coffee maker or its carafe to measure water, but if you have a scale handy weigh your water for added consistency (1 ml of water weighs 1 gram). A fun idea to play with for the summer: use half as much water as usual and weigh out a half batch of ice (for this recipe, 625 g) directly in your pot. The coffee will drip onto the ice for flash-chilled iced coffee.
2. Prep Filter
If your drip coffee maker uses a cone-shaped filter, fold the crimped edges in opposite directions before placing it in the filter basket. If you’re using a wavy, flat-bottomed filter, place it inside the basket as is. Some coffee makers come with a reusable stainless steel filter; if that’s the case, no prep needed.
3. Brew Coffee
If you have a bag of pre-ground coffee, just skip right over to the next paragraph. If you’re grinding fresh, start at medium grind size (some grinders have a specific “drip” setting). Since most home coffee makers don’t let you adjust settings like time and temperature, changing grind size is one of the most important ways you can influence taste. Make sure to note your grinder setting, so you can either repeat it or make an adjustment next time you’re brewing. Blade grinders don’t have the same types of settings as burr grinders, so if you’re using one of those, try to grind until most of your particles look roughly the size of sand.
Add your coffee grounds to the filter and place the basket back inside the machine.
Turn on the machine and wait for the brew cycle to complete. Your machine may have extra features like a “strength” selector, but our recipe works best at the default setting (and if you want coffee that’s weaker or stronger than our recipe, you can always adjust the amount of coffee next time). Brewing should take between three and five minutes on most machines, from the time the water starts dripping onto the coffee to when it drips all the way through the coffee grounds.
4. Serve & Enjoy
You’ve got some freshly brewed coffee ready to drink! If your drip machine has a glass carafe and an electric warming plate, we recommend taking that carafe off the warming plate, as the heat of that plate might make the coffee taste bitter. If you have leftover coffee and want to keep it piping hot, pour it in a thermos.
When you drink your coffee, note how it tastes. If it’s more bitter than you’d like, you can grind coarser for your next batch, if it’s a little sour or not sweet enough, grind a little finer.